Batting Cage Steel Pole Install
Below are the steps you need to take to install a Batting Cage Net using 2" Steel Netting Poles, this install is 12' x 12' x 55' batting cage and we are using 12' tall poles
Please scroll to bottom for diagrams of other sizes
Determine area in which batting cage frame will be erected.
(Cage should be at least 2’ from any solid objects such as trees structures etc.)
Mark for hole “A” (Starting point) with paint, lime, etc. or just Install first Ground Anchor
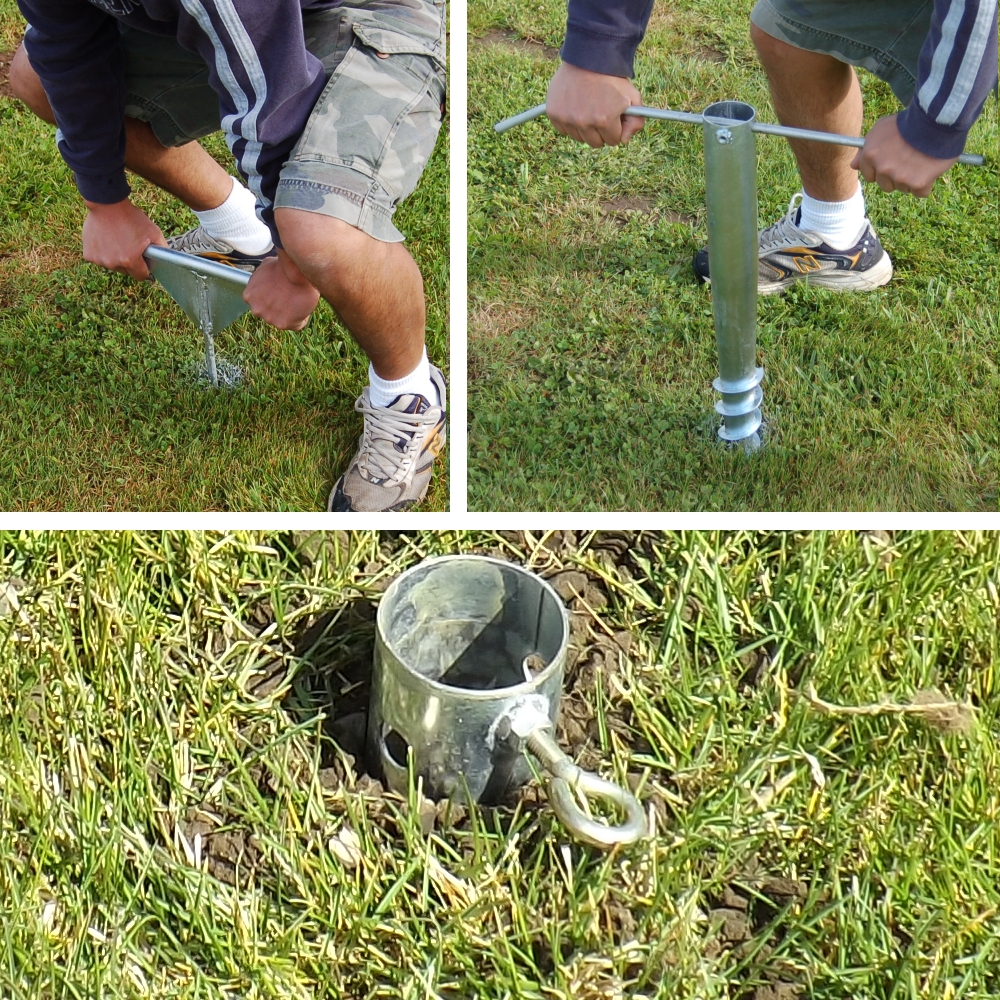
Install the first ground anchor by pushing the included probe as far into the ground as possible, if you are able to push it all the way down it should be easy to screw the ground anchor in, if you can't push it all the way down it may be more challenging to screw it in and you might need to pull the anchor out a few times as you screw it in to remove some of the dirt.
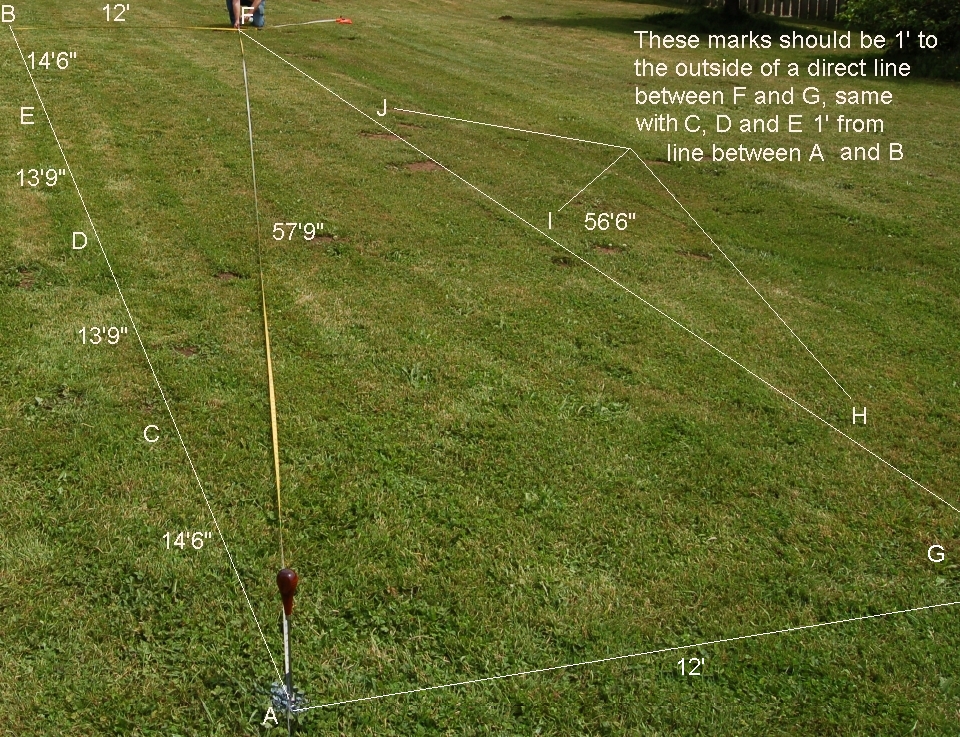
With 50’ or 100' tape, measure from “A” to hole “B”. Mark hole “B”. (See image below)
While tape is still laying out from “A to “B”, mark for holes “C” and “D” (Note “C” and “D” are 1’ to the outside of a direct line between “A” and “B”)
Next measure diagonally across from “A” to “E” and, with a separate tape, from “B” to “E”. The 2 tapes should intersect at the lengths indicated on diagram. Mark hole “E” at intersection.
Now measure from “E” to “F” and, with a separate tape, from “A” to ”F”. The 2 tapes should intersect at the lengths indicated on diagram. Mark hole “F” at intersection.
While tape is still laying out from “E” to “F”, mark for holes “G” and “H”. (Note “G” and “H” are 1’ to the outside of a direct line between “E” and “F”)
You are now ready to install the remaining ground anchors.
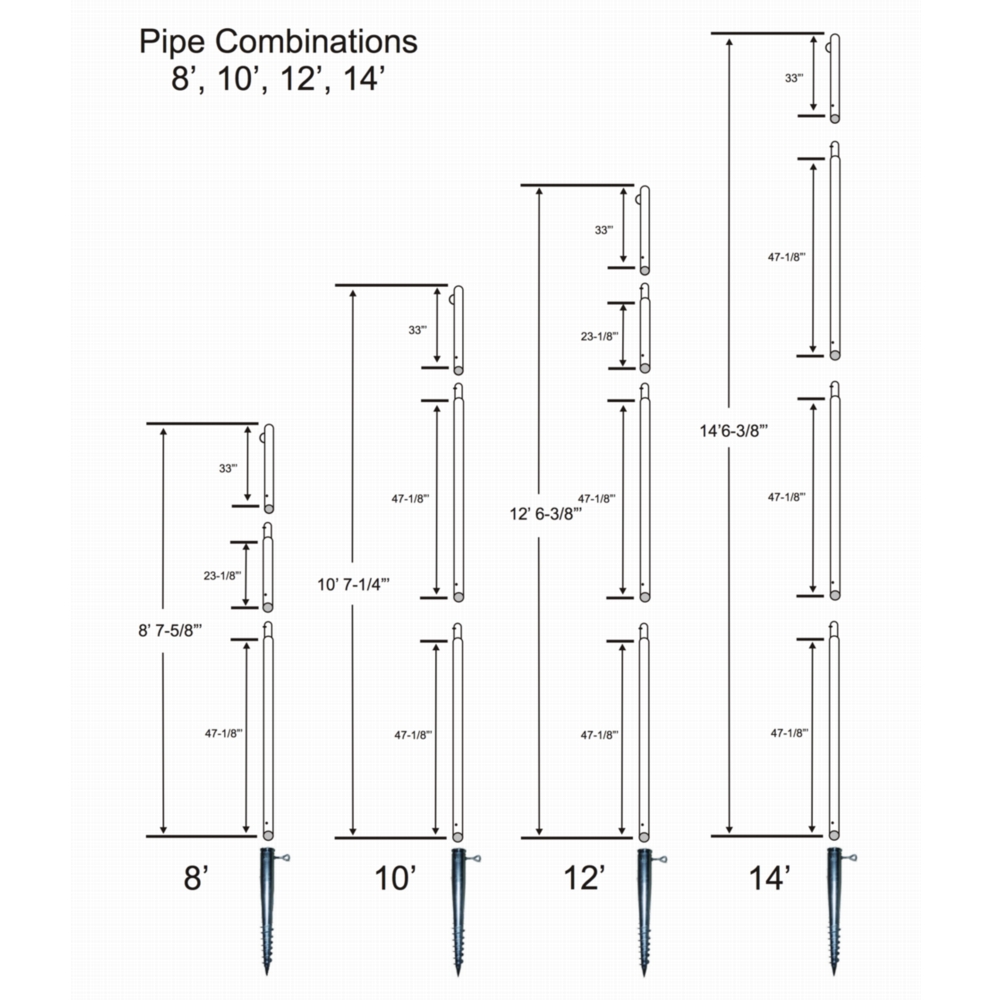
Snap lock poles together, for a 12' pole you will need to assemble two 47" sections then a 23" section and last the top 33" section. (see image below for different sizes)
 Lay batting cage net on ground between ground anchors and snap included snap hook (carabiner) where each pole will be attached, starting at one end snap the two end poles to net and place pole into ground anchor.
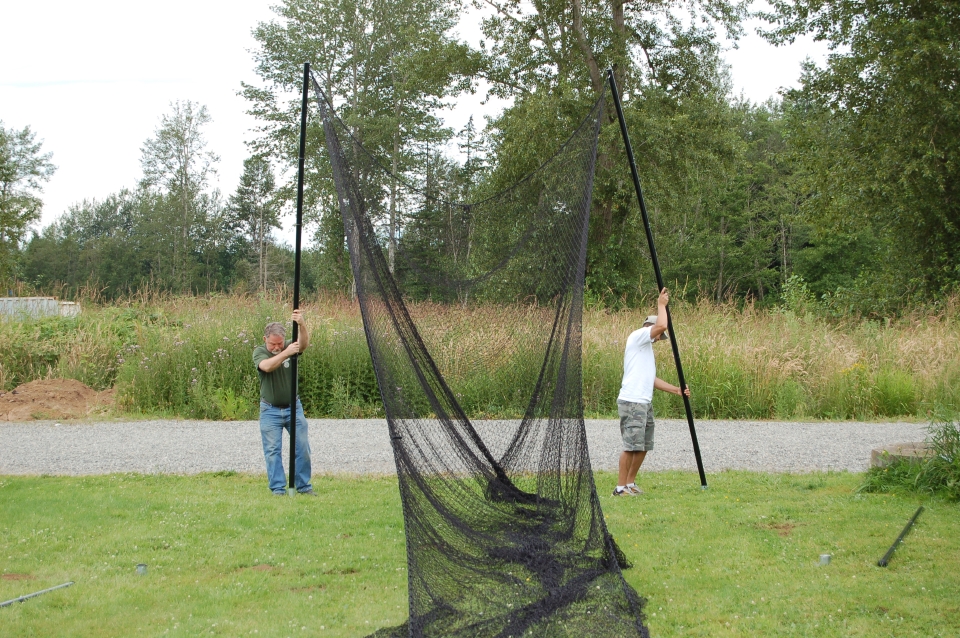
Snap each set of poles to net and place in ground anchors, if net is too loose or too tight just place snap hook in a different spot for minor adjustment
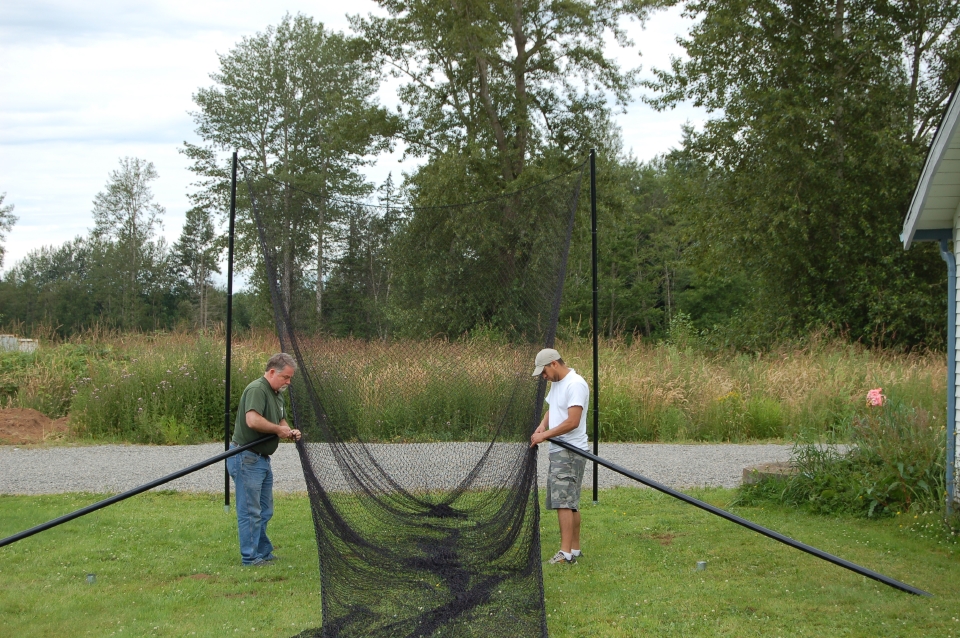
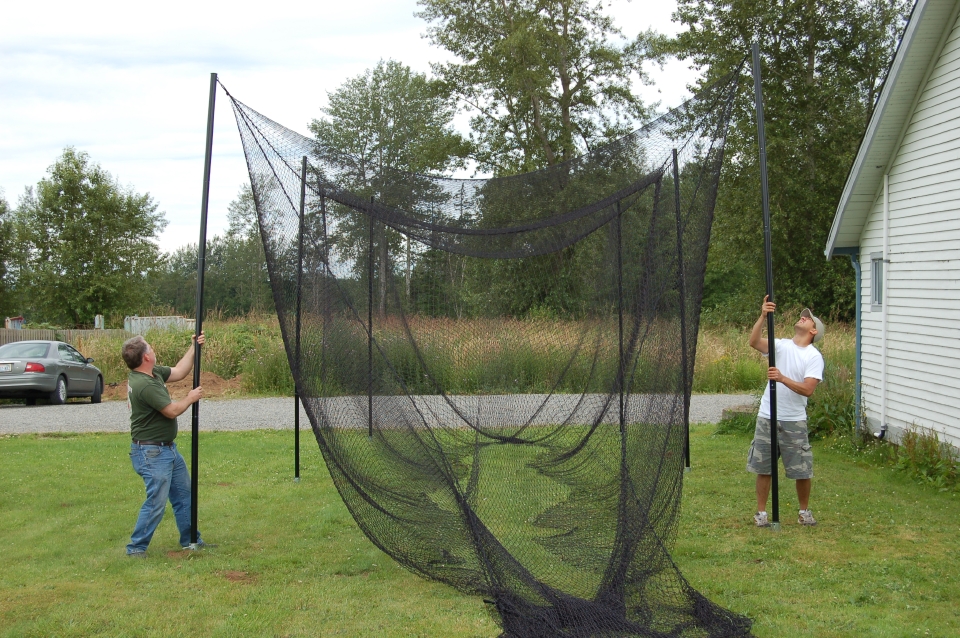
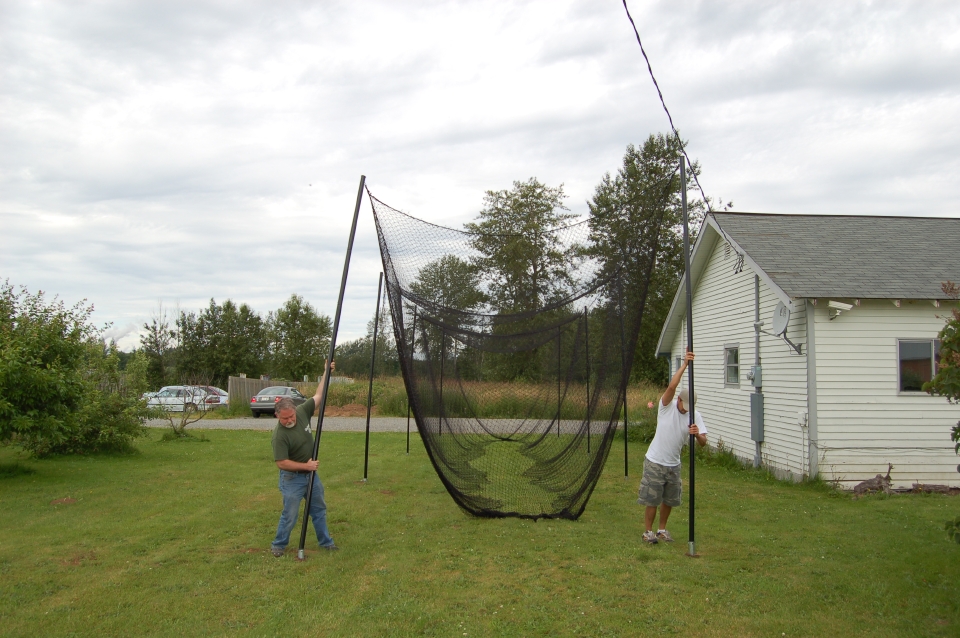
This setup can be taken down in just a few minutes, you can just lay each pole on the ground with net attached if a wind storm is expected or if you live in a development where home owners rules don't allow large permeant structure like this. If poles are hard to lift out of ground anchor because of the pressure from the net, one option is to un-snap the pole sections or remove net using a ladder. Leave snap hooks attached to net for easy installation next time.
Layout for 10x10x40' Batting Cage
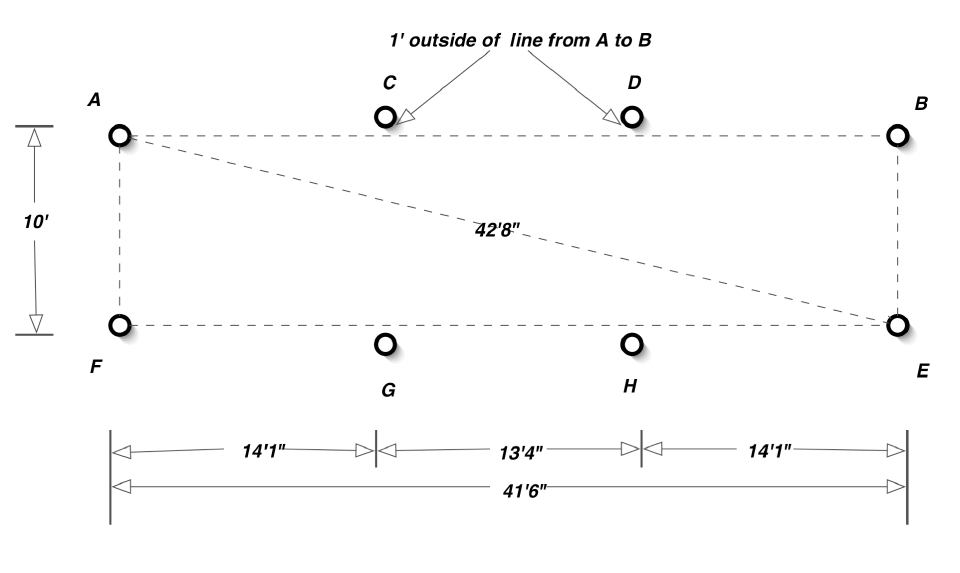
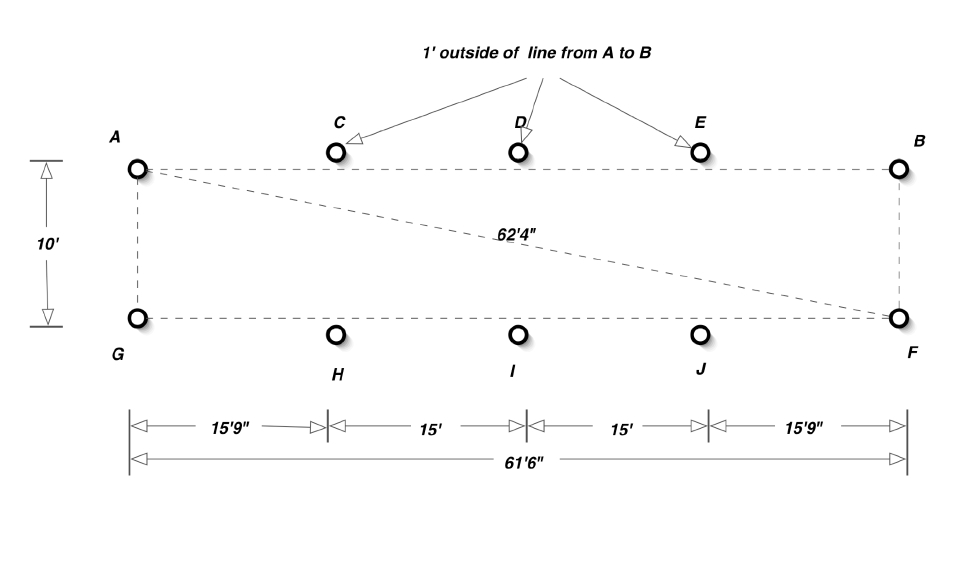
Layout for 10x10x60' Batting Cage
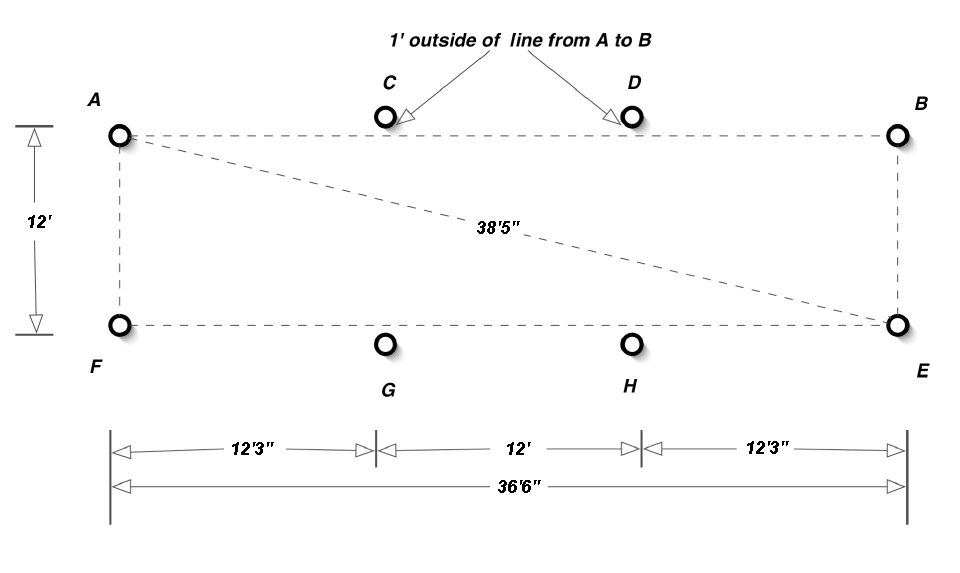
Layout for 12x12x35' Batting Cage
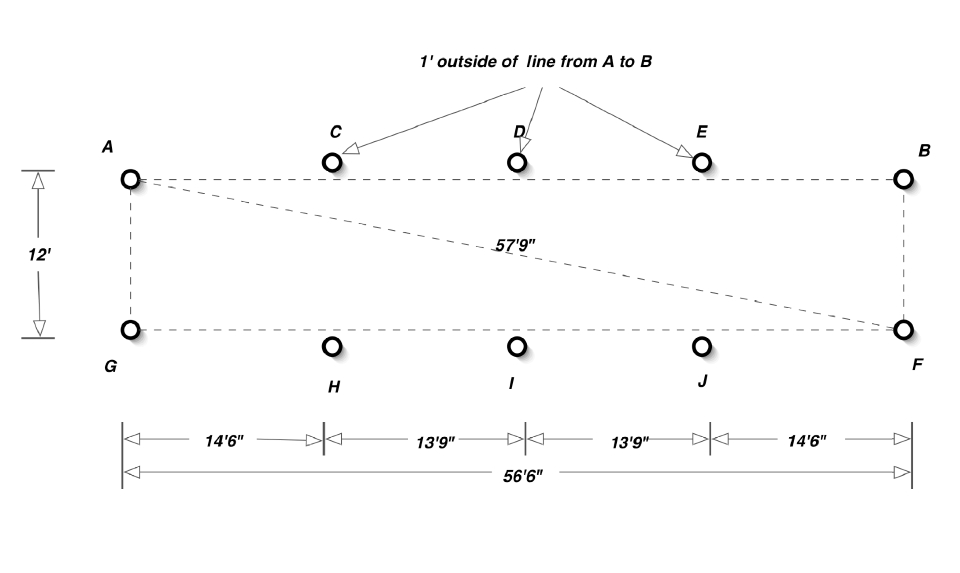
Layout for 12x12x55' Batting Cage
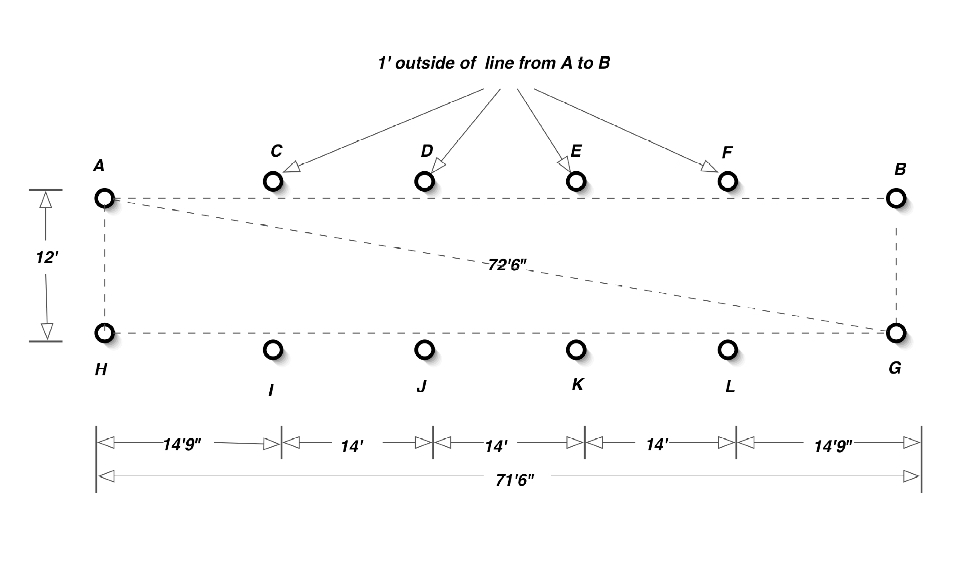
Layout for 12x12x70' Batting Cage
Please scroll to bottom for diagrams of other sizes
Determine area in which batting cage frame will be erected.
(Cage should be at least 2’ from any solid objects such as trees structures etc.)
Mark for hole “A” (Starting point) with paint, lime, etc. or just Install first Ground Anchor
Install the first ground anchor by pushing the included probe as far into the ground as possible, if you are able to push it all the way down it should be easy to screw the ground anchor in, if you can't push it all the way down it may be more challenging to screw it in and you might need to pull the anchor out a few times as you screw it in to remove some of the dirt.

With 50’ or 100' tape, measure from “A” to hole “B”. Mark hole “B”. (See image below)
While tape is still laying out from “A to “B”, mark for holes “C” and “D” (Note “C” and “D” are 1’ to the outside of a direct line between “A” and “B”)
Next measure diagonally across from “A” to “E” and, with a separate tape, from “B” to “E”. The 2 tapes should intersect at the lengths indicated on diagram. Mark hole “E” at intersection.
Now measure from “E” to “F” and, with a separate tape, from “A” to ”F”. The 2 tapes should intersect at the lengths indicated on diagram. Mark hole “F” at intersection.
While tape is still laying out from “E” to “F”, mark for holes “G” and “H”. (Note “G” and “H” are 1’ to the outside of a direct line between “E” and “F”)
You are now ready to install the remaining ground anchors.

Snap lock poles together, for a 12' pole you will need to assemble two 47" sections then a 23" section and last the top 33" section. (see image below for different sizes)
 Lay batting cage net on ground between ground anchors and snap included snap hook (carabiner) where each pole will be attached, starting at one end snap the two end poles to net and place pole into ground anchor.
Snap each set of poles to net and place in ground anchors, if net is too loose or too tight just place snap hook in a different spot for minor adjustment


This setup can be taken down in just a few minutes, you can just lay each pole on the ground with net attached if a wind storm is expected or if you live in a development where home owners rules don't allow large permeant structure like this. If poles are hard to lift out of ground anchor because of the pressure from the net, one option is to un-snap the pole sections or remove net using a ladder. Leave snap hooks attached to net for easy installation next time.
Layout for 10x10x40' Batting Cage

Layout for 10x10x60' Batting Cage

Layout for 12x12x35' Batting Cage

Layout for 12x12x55' Batting Cage

Layout for 12x12x70' Batting Cage
